
Updating Cacti can be easy or tricky depending on your system size and design.
In general, there are a few steps for a safe upgrade follow the below steps to properly and safely upgrade your cacti server
In this scenario, I am upgrading from Cacti 1.2.2 to 1.2.4 which is the latest release version at the time of this writing.

Step 1.) Stopping the poller cronjob this is important for consistency purposes we don’t want cron to run the polls while we are upgrading the system
add a # in front of the cron entry
#*/5 * * * * www-data php /var/www/html/cacti/poller.php > /dev/null 2>&1
Step 2.) Backup the cacti database
We use the mysqldump command to dump the database named cacti to cacti-backup.sql this is a very important step as the database contains all system settings such as user accounts and devices we are monitoring without the database your cacti instance will be back to scratch so again its important that we keep this backed up.
root@localhost:~# mysqldump -u root -p cacti > cacti-backup.sql
Enter password:
root@localhost:~# ls
cacti-backup.sql
Step 3.) Backup the existing cacti directory
In this case I am moving the cacti directory to the /tmp directory the cacti folder contains all of the files needed for cacti along with the graphs which are located in the RRA folder import notice if you have a large installation with many devices you might want to move this folder to a network share or something with a lot of space.
root@localhost:/var/www/html# cp -R cacti/ /tmp
root@localhost:/var/www/html#
Step 4.) Download the new version of cacti
I will be downloading the latest 1.2.4 release from the Cacti projects GitHub page wget https://github.com/Cacti/cacti/archive/release/1.2.4.zip
/code
HTTP request sent, awaiting response… 200 OK
Length: unspecified [application/zip]
Saving to: ‘1.2.4.zip’
1.2.4.zip [ <=> ] 11.28M 6.26MB/s in 1.8s
2019-07-13 19:13:45 (6.26 MB/s) – ‘1.2.4.zip’ saved [11831094]
/code
Step 5.) rename the current cacti directory in /var/www/html to cacti-back
root@localhost:/var/www/html# mv cacti/ cacti-back
step 6.) copy the new cacti directory to /var/www/html
Moving the files in place of where the old files are essentially completes the upgrade we will need to apply the proper permissions as well
root@localhost:~# mv cacti/ /var/www/html/
root@localhost:~# chown -R www-data:www-data /var/www/html/cacti
Step 7.) copy the RRA and config file
this will copy your graphs along with your config file needed for cacti to access the database and other settings
root@localhost:~# cp /var/www/html/cacti-back/include/config.php /var/www/html/cacti/include/
root@localhost:~# cp -R /var/www/html/cacti-back/rra/* /var/www/html/cacti/rra/
root@localhost:~#
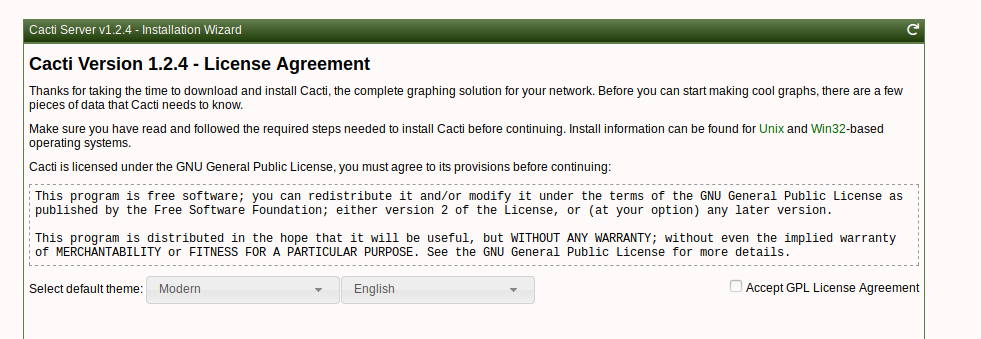
Step 8.) Browse to the cacti page which should now bring you the web installer to complete the upgrade
See my below video tutorial on this procedure!
Hi Sean,
There’s no directory called ‘Cacti’ in /var/www/html
I’m running 1.2.2 on
root@Cygnus:/etc/cacti# uname -a
Linux Cygnus 4.19.0-13-amd64 #1 SMP Debian 4.19.160-2 (2020-11-28) x86_64 GNU/Linux
..and installed cacti with apt-get right after installing Debian on this pc I dedicated to running cacti.
So I came screeching to a halt at step 3. Now I could go galavanting around the internet and figure this one out, but I’m afraid of breaking things.
Could you nudge me in the right direction, please?
Thanks,
Leo
Hey Leo!
Thanks for the comment I sent you an email so we can look at this together!
Hi,
I have upgraded cacti 0.0.8h in Centos 6.8 to cacti 1.2.17 but when I access obtain error:
Parse error: syntax error, unexpected ‘[‘ in /var/www/html/cacti-1.2.17/lib/functions.php on line 5722
But I can’t find where the error may be. Any help?
5715 function get_running_user() {
5716 global $config;
5717
5718 static $tmp_user = ”;
5719
5720 if (empty($tmp_user)) {
5721 if (function_exists(‘posix_geteuid’)) {
5722 $tmp_user = posix_getpwuid(posix_geteuid())[‘name’];
5723 }
5724 }
5725
Hello There
Please send me an email I would love to help!
Sean,
I too have this issue, originally installed via apt-get, and currently on 1.2.10, I need to upgrade ubuntu distros. which removes cacti. once the OS is upgraded. apt-get currently only has 1.2.19 which has a small bug. so I would like to upgrade to rev 1.2.23 after the distro upgrade. any help you could extend my way?
Hey Scott
Honestly the best way around this is to download the Cacti source code and and manually install
I find I have much better control over the install rather than installing via a package manager
Also when there is a new version you can get it as soon as its available and not have to wait for the package maintainer to release the package
Hi Sean,
i have two questions. The first one:
my main cacti folder is in /
I think they installed it here. And instead of www-data the owner of rra is apache.
Do you think i should change any step of your procedure or i can simply start by assuming that my reference folder is in / ?
The second one:
on the Cacti website they use this command for the sql backup:
mysqldump -l –add-drop-table –lock-tables=false cacti > mysql.cacti
is it safe to use that –add-drop-table?
Or it’s better to use the simple one you have in the procedure?
I know it may sound stupid this question but i wanted to be sure of what to do.
Thank you so much!
Hope to receive feedback soon
Hey there!
So it sounds like your running on a cebtos/rhel system which is fine as the process is not much different
Change your destination folder so yes if your installed in / then move the files there
Assign the permissions of your wwbserver user in rhel based systems it’s apache:Apache unless changed to something else
As for the dB dump I don’t usually explicitly add the drop tables but there is no harm in doing it
Without it the resulting sql file will have a clause drop table if exists and since you would be using that file to restore it would delete any added tables during the upgrade
Hope this helps!
Hi Sean Mancini
Could you share how to upgrade cacti for centos 6.8 ?
thanks
Hey Sam the upgrade procedure is about the same for centos as it is for ubuntu
Hello,
I just installed a cacti from scratch using the install wizard (https://github.com/bmfmancini/cacti-install-wizard).
All went fine but when I start the local website its only a white page.
I am running it on Ubuntu latest version.
Any help to this?
hey there
Thanks for using the script!
If you are getting a white page it could be a few things
1.) make sure php-mysqli actually installed
2.) Make sure the database was created and the cacti.sql file was imported
feel free to email me so we can trace it this script needs to be updated as well
Hello, it looks like I successfully installed a completely new instance of cacti using your script. At least there were no error messages during the script installation. However when I try to login using the local cacti website I get a white page without any error message. The system is running ubuntu.
Anything else I might check?